Conference Badges!
For the second year in a row NY Haskell hosted the C◦mp◦se :: Conference here in NYC. Luckily we had some great venue sponsorship this year, taking off a great deal of weight off our shoulders compared with last year. Despite the incredible amount of support for niche functional programming languages in industry conference, we are still nascent in our journey and still had yet to create a custom badge.
Here’s where I come in as the only organizer with design experience working with low budgets… creating bespoke badges the day before. Yay, time to learn how to use Adobe InDesign :)
Designed bespoke #composeconf badges this year :) many thx to @obsidian_llc who volunteered to assemble them!! pic.twitter.com/8ZPPWkJa0k
— Kat Chuang (@katychuang) February 4, 2016
It’s a pretty simple process overall, thought it took a while to learn how to get the margins correct with InDesign for creating name badges. That’s what took the longest in terms of figuring things out. I couldn’t find a tutorial that explained it in a straightforward way so I wrote one up below to help others. Let me know in the comments below any questions you might have.
~*~
Tutorial!
Here are the steps you’d need to go through to generate badges from a CSV file. I was able to export CSV files directly from EventBrite.
1. Create a document letter sized with the right margins.
The Avery 74459 dotted paper had 2.4cm margin at the top and 2.6cm at the bottom. 0.75cm on the left (inner) and 0.5 cm margin on the right (outer). No idea why it was asymmetrical, but set it so you can work with the right dimensions for placing badge items.

2. Place in one corner of the new document layers for one badge.
I used a blank rectangle shape layer to indicate the badge size 3” x 4” so I can see how to lay out the logo, titles, and other information.
a. Place empty text layers for where you’d like fields to appear.
Next we’re going to fill them in with the fieldnames that show up with the brackets <<< >>>.
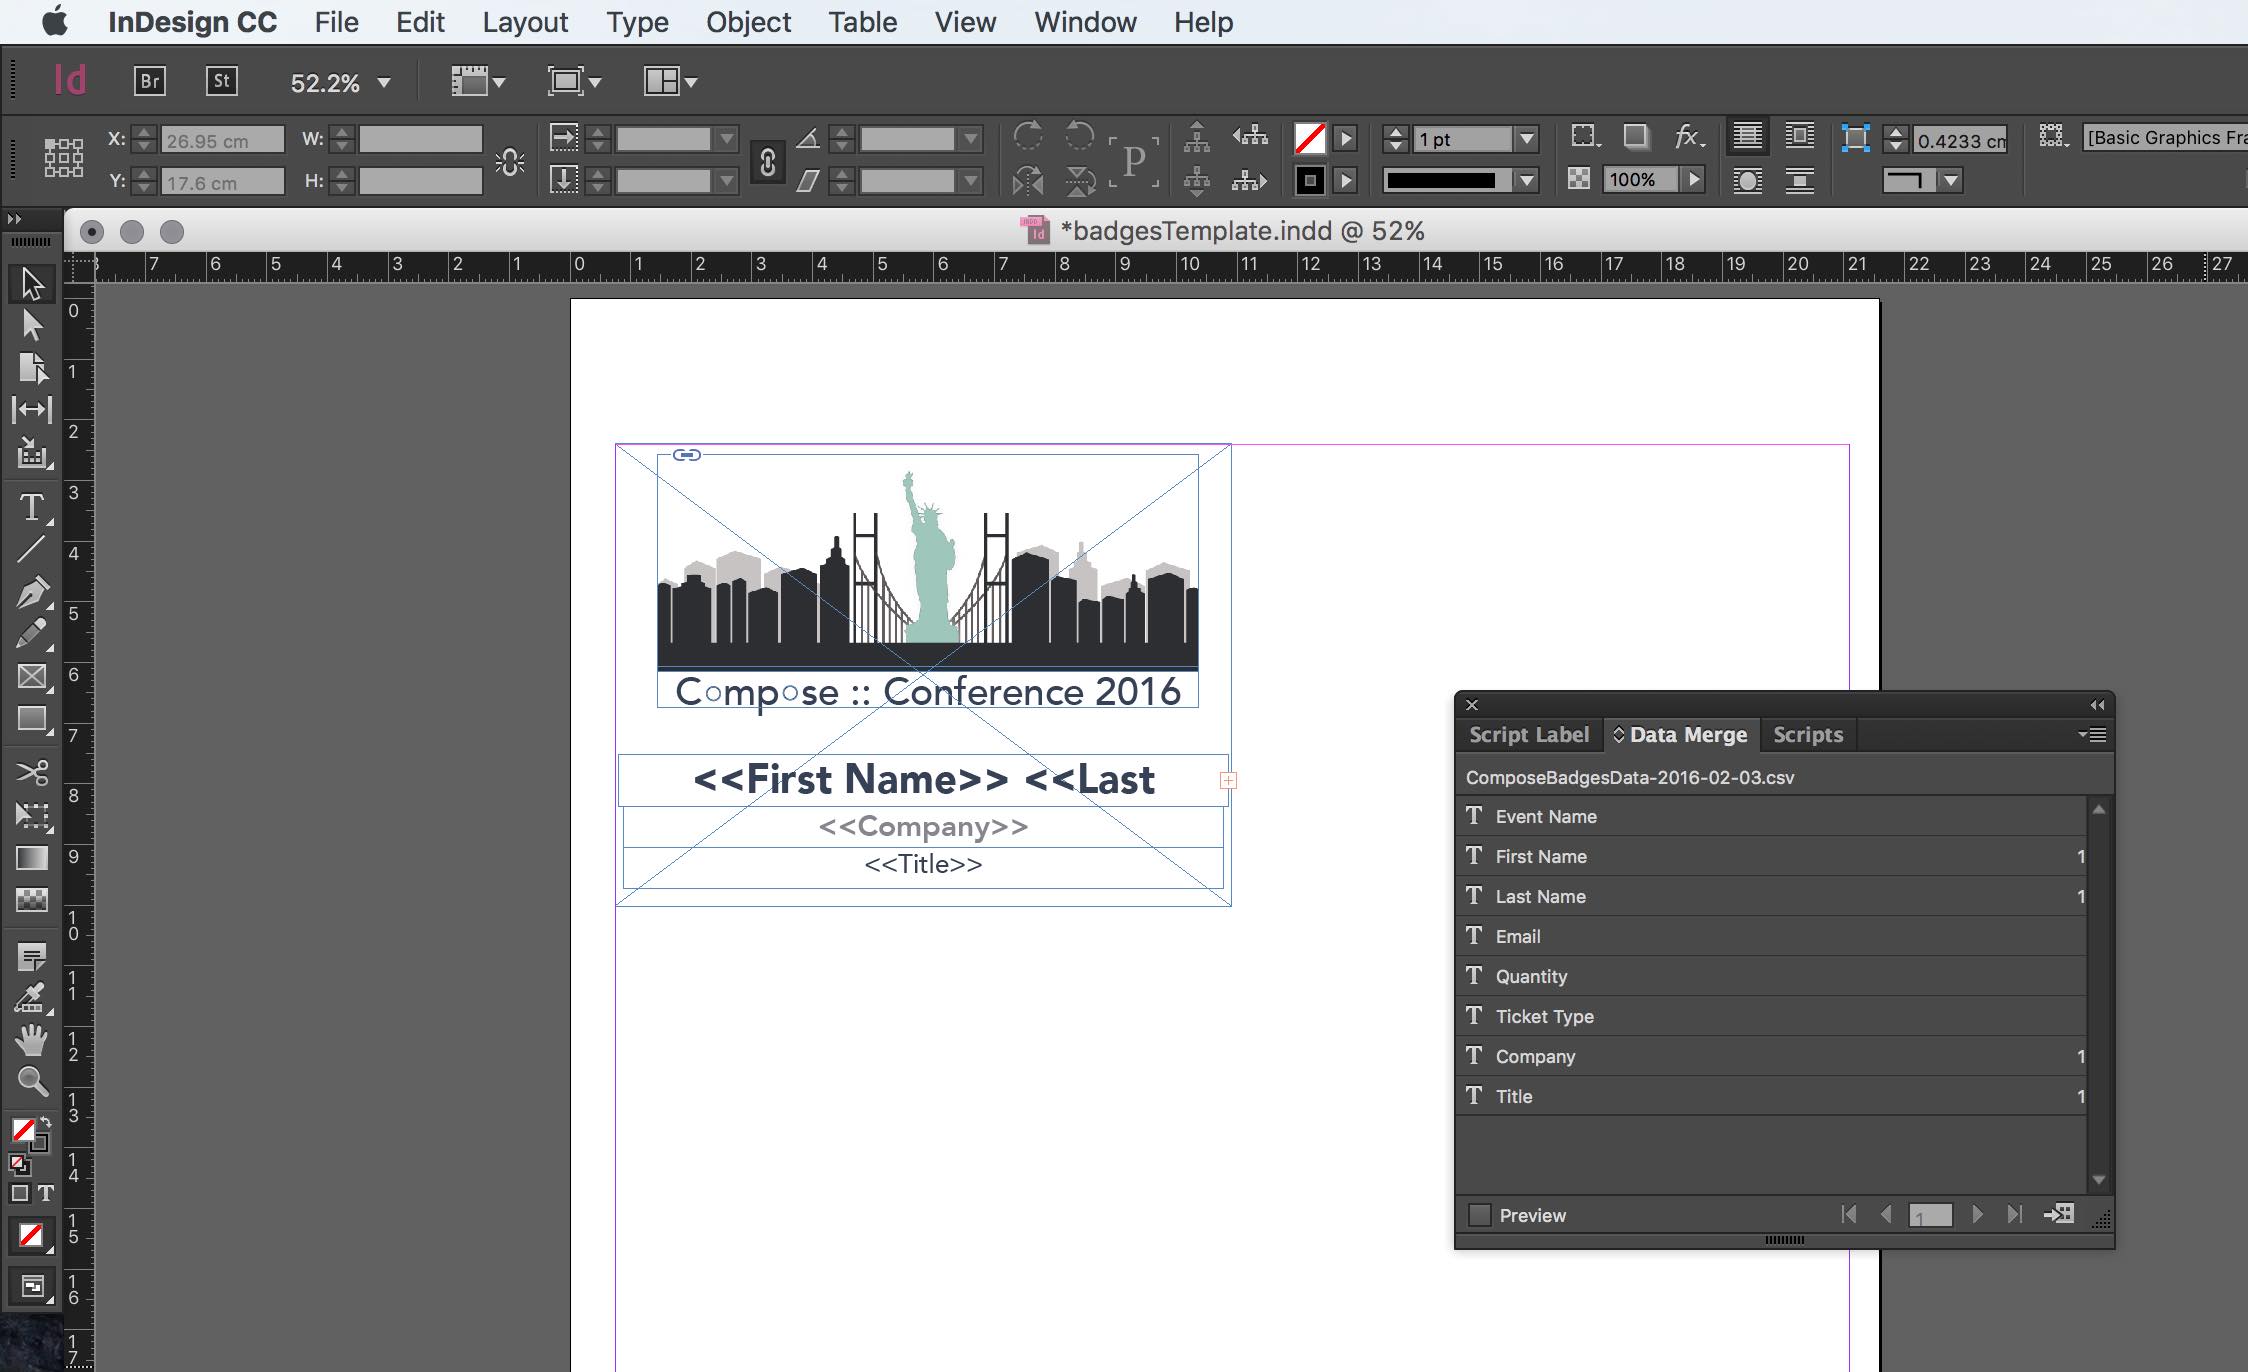
b. Import data source file
Go to Window > Utilities > Data Merge to open up the panel. There you can select a csv or txt file to import data.
c. Drag and drop fields from the panel into the text areas
You can combine two fields into one text layer. Shown in the screenshot above is First Name and Last Name appearing in one line.
d. Style as you’d like any of the text layers.
Change the font family, font size, colors, etc. I made the alignment centered for all three lines.
Now you’re ready to merge records to the template.
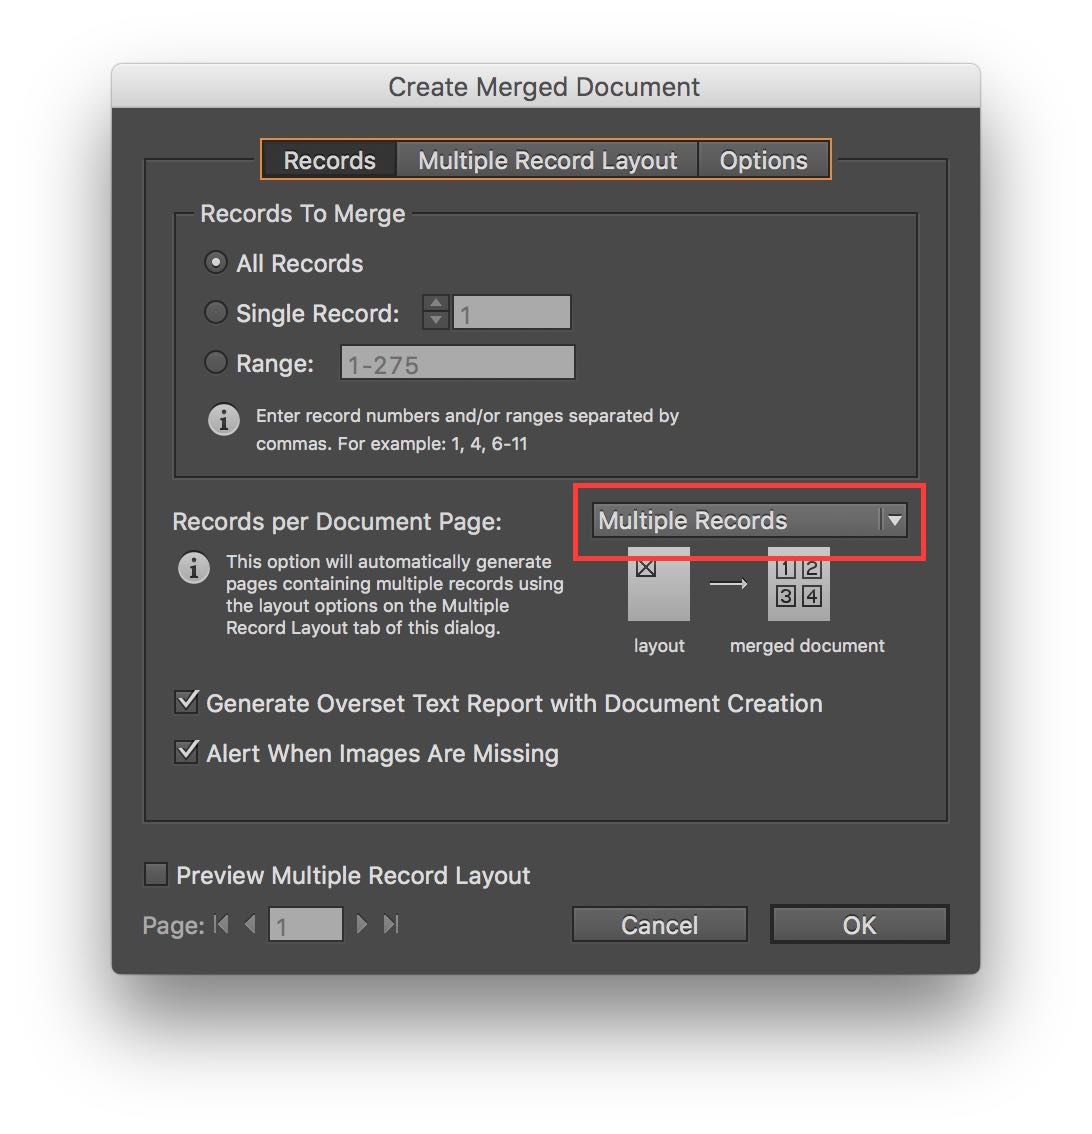
3. Start the merge process by clicking the grid icon at the bottom right of the data merge panel.
Select the option: multiple records
Highlighted with a red box for you below…
Set page margins
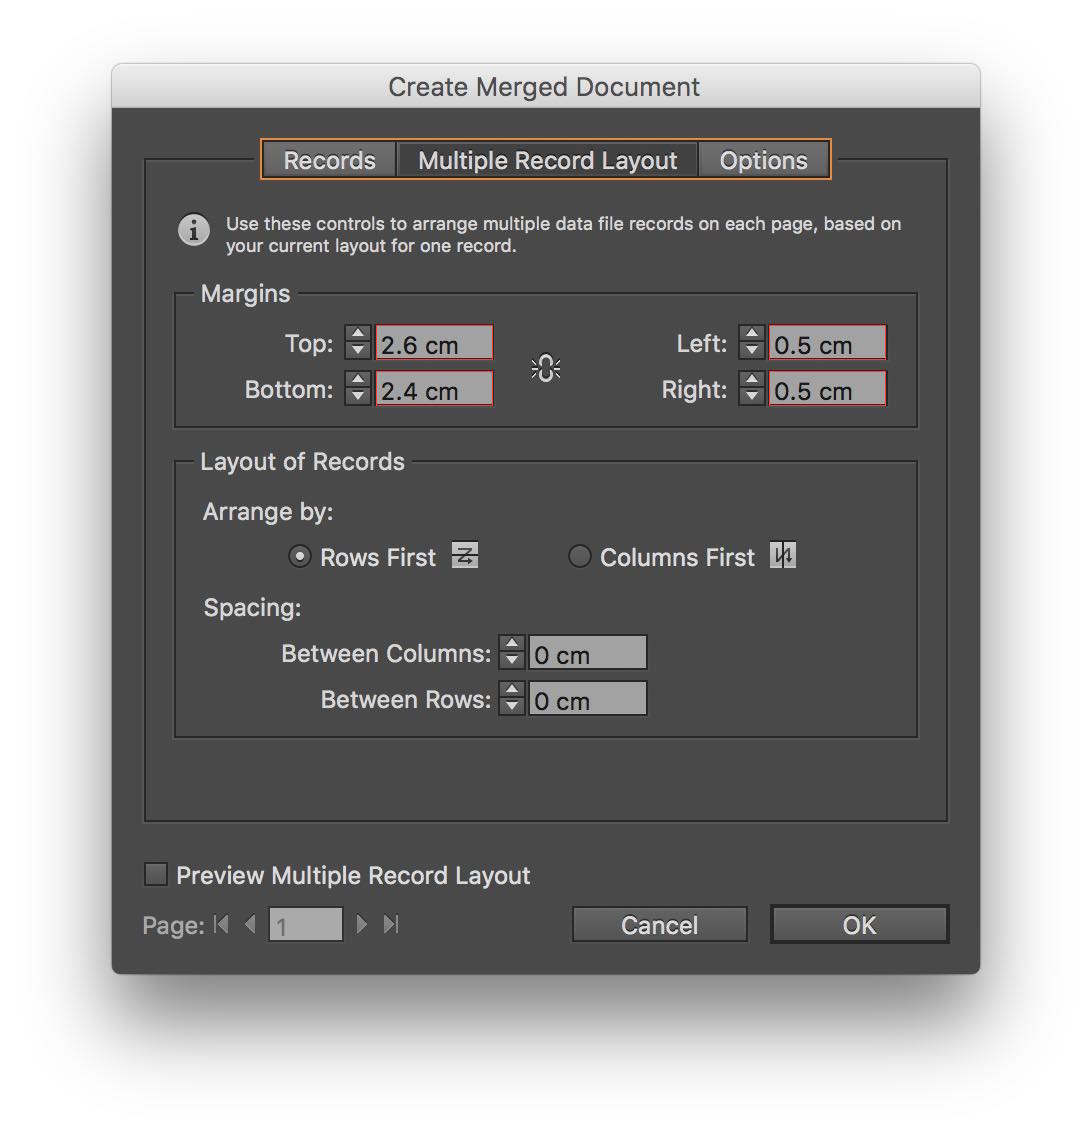
This will create a new file with 6 badges per page that align with Avery’s name badge template. Here’s where you can go ahead and print to your printer. Perhaps you can save a copy in case you need to come back to edit any text
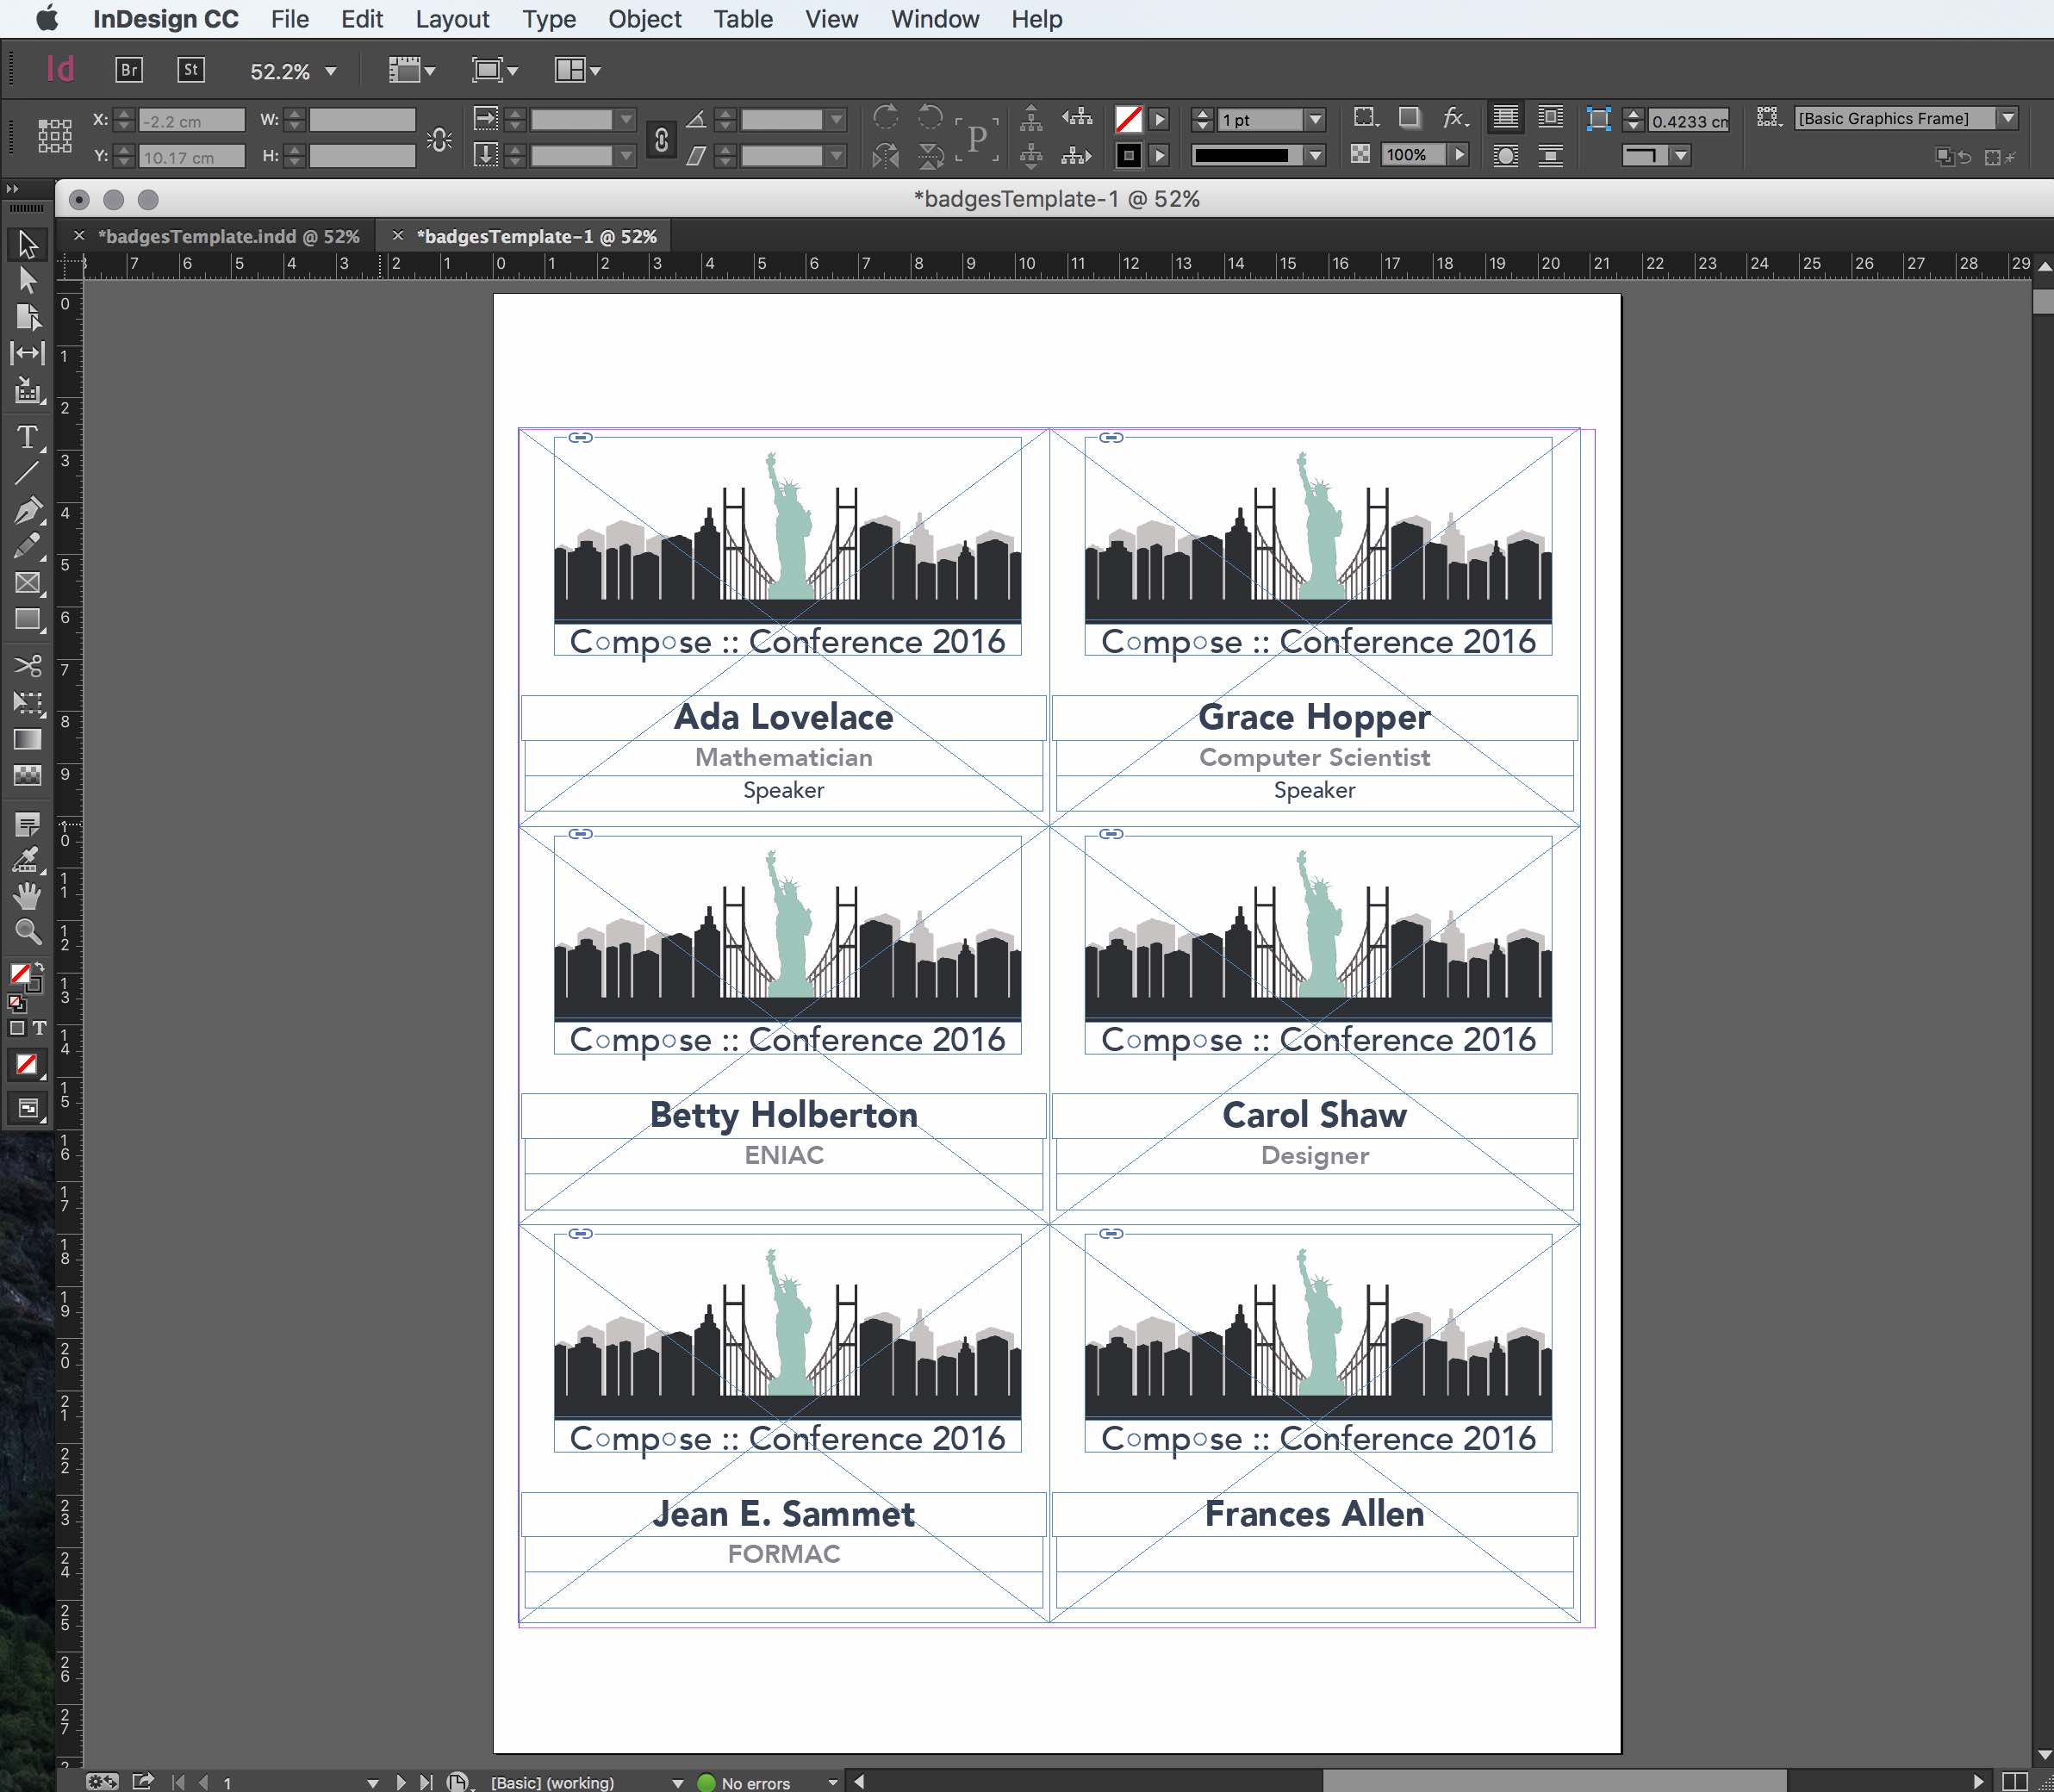
4. Print a test page
And there it is, a few simple steps to get your templates ready.
~*~
I learned through the process that there’s terrible unicode support in Adobe for unicode characters. Some folks had foreign names with accents that came out garbled.
Eventbrite didn’t capture the correct capitalization for many individuals. The forms also couldn’t verify the formatting of strings. For example with twitter usernames some use @ and some don’t, so it was difficult to standardize with the template.
~*~
Feel free to let me know in the comments below if it was helpful, or if you have any questions. Thanks for taking the time tor read this tutorial! :)